How to ventilate a Mac
How I learned to stop worrying and love the hole saw
While I dearly love the raw power that my dual gigahertz G4 gives me, it comes at a cost paid in heat and fan noise. I keep my computer in the side compartment of a computer desk in my studio. With my old system (a beige G3) when I needed it completely quiet I was able close the cabinet for periods without fear of a cooked computer The new machine would not survive for long in those confines.
I considered several options but due to lack of available space (space is expensive here near the beach) I couldn't set up a machine room nor did I have the space for a large isolation box. My solution was to punch holes in the floor and duct my computer into the garage beneath my studio.
Extreme? maybe.
Effective? definitely.
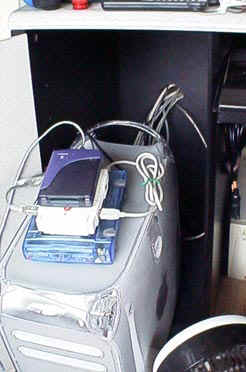
This is how I originally had my computer set up. The back panel in the desk was a something just a little thicker than cardboard.
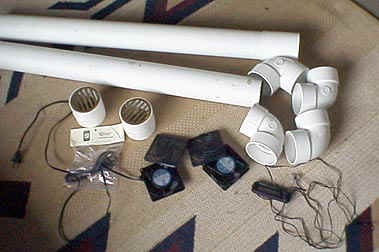
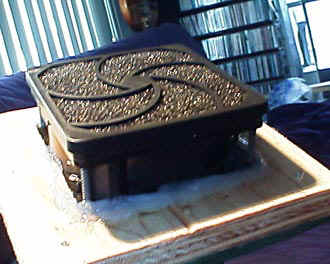
These are most of the parts that were used to do the ventilation job. The most expensive part were the fans. Between the two fans, the filters and power cords it was just about $50. The PVC pieces were very inexpensive.
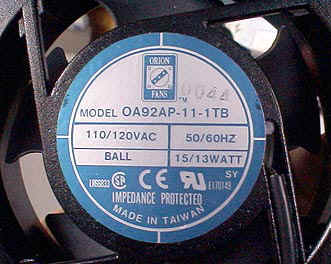
I decided to use AC powered fans to deliver the force that I figured I needed to move the air through the pipes and circulate it in the enclosure.
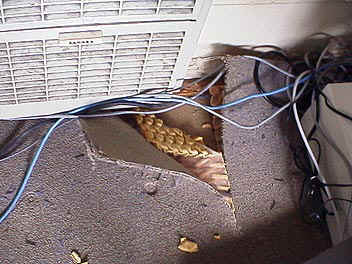
The first real damage is done. A quick slit in the carpet to expose the flooring beneath. I could still turn back with minimal repair work... nah, time for the big saw.
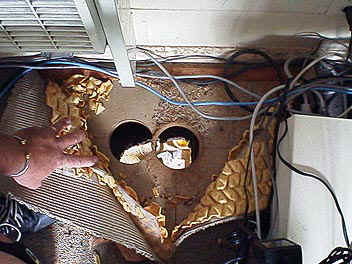
Now it's serious, I can now see into the garage below. A beefy hole cutting saw was used to wreak this havoc. It's not really that bad. A little patch work and everything could be good as new, or at least not easily detectable.
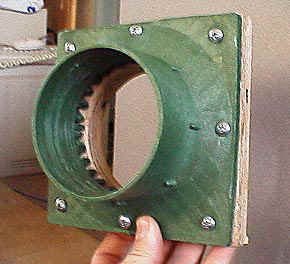
One of the items that had to be improvised were the fan mounts. The hole saw ended up being used to take out the grill in this plastic drain. A little silicone and some screws and we're rolling.
With the plywood we now had a surface to mount the fan on. A generous application of silicon again ensues an air tight seal.

Looking behind the desk you can see the two PVC pipes dropping down through the floor. A piece of 3/4" plywood was used to replace the cardboard backing on the desk.
Here is the view from the garage. Due to the thermal mass of the building above the garage it always stays cool down there even in hot weather. This was one of the reasons I chose to go through the floor.
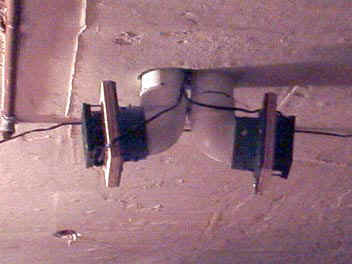
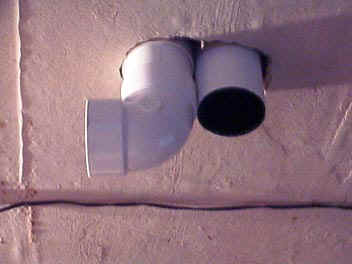
Here you see the fan assemblies mounted on the pipes and the power cords passing back up through the floor. 90 degree angle pieces were used so that the hot air coming out is not picked up by the fan pushing cool air in.
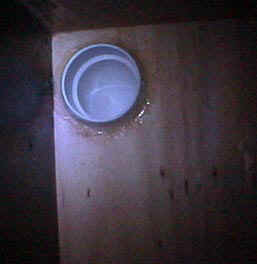
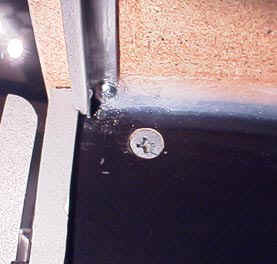
Here is the duct in the top rear corner of the desk that is used to suck out the hot air. Again silicone was used generously to seal the hole around it.
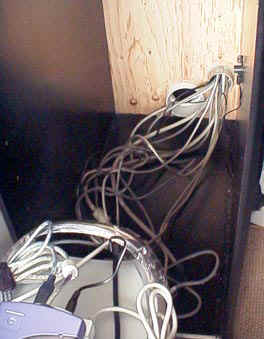
I wanted to be able to completely pull out the computer for maintenance without unplugging everything. I made sure I had enough cable fed through the 2" pipe segment I was using for the cable run. Next to that you can see the cool air feed.
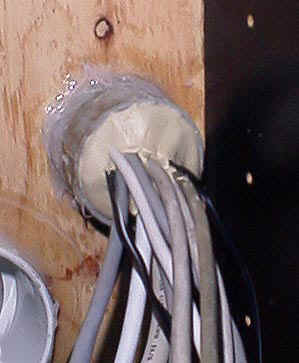
Once I had everything wired up I used plumbers putty to pack the air space around the cables. The closest this putty gets to hardening is a slightly rubbery state.
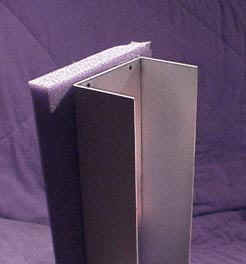
I used adhesive backed foam weather stripping to seal all the way around the front door of the compartment. The top and bottom didn't have a suitable place to mount the foam so I bought a length of 1/4" aluminum L-bracket to use. Hey look at that, more silicone ;)
Since the computer would be blocking the cool air feed I decided to make a little stand off to elevate it. I used half of an old electronics project box and piece of foam from a previous project to make this. I figured that the foam would also serve to mechanically isolate the computer from desk.
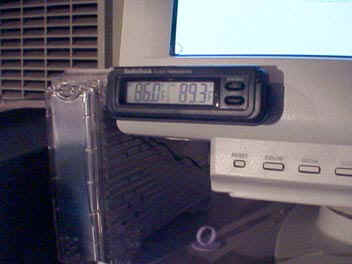
In order to monitor the heat I picked up a $15 Radio Shack Indoor/Outdoor Car Thermometer (#63-1023). I mounted the remote sensor right in the middle on one of the inside walls.
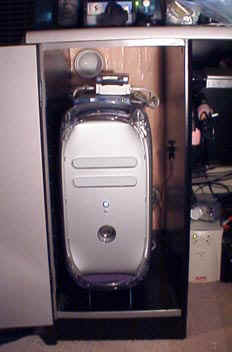
Here is the finished product. The entire project cost less than $100 in parts and keeps the computer cool and the studio quiet.
Next week we'll ventilate a PC. All you need is one PC, a shotgun…